Creative DIY Like Mother Like Daughter

Creative DIY Projects

Table in all its Grandeur! September 24, 2015

When I shared the results of Great Grandma’s table at the end of June, I did not have pictures of the new brackets or the table put back together. I admit to not planning ahead for pictures of the stages because I have a tendency to work straight through to the finish.

It worked out well because I realized that the table needed some detail work. The top needed to be sanded with steel wool and resealed and the legs needed another coat or two of stain. Working with stain on the table, and the hopechest, has giving me a higher appreciation for a smooth stain finish. It looks so easy but it is not easy for me!

While I was researching the new hinges for the table I found something interesting. There are support brackets that will fold down with the table. Similar to those used in some nail salon chairs and tables in travel trailers. I decided to order some to add extra support to the table wings. Previously they were only held up with the wing piece that folded open but it was not the best idea because the dogs could knock it down with their heads.  

 We flipped the table over in the dining room so that I had a flat surface to use to attach every thing. The special supports did not work because the angle of attachment was wrong. Once I was done we flipped the table right side up and stood back to look.

  
All lesson learned and project accomplished. I am proud of the work I did!


Great Grandma’s Table: Resealed & Renewed June 24, 2014

Filed under: Adventures in Project Land — Colli @ 9:27 am
Tags: , ,

When Ash and I moved into our first apartment together my parents gave me my Great Grandma’s table. My Dad had sanded the surface and made it ready to be stained and sealed. Confusion: That was Memorial Day 2011 and the table is still not sealed…. eeek!

Until recently I had not worked with stain and I was intimidated by the thought of it. I did not want my first project with stain to me the table so I kept pushing it off. The table has been covered with a table-cloth to project it from as much as possible.

Now that I feel more confident with staining I have decided it is time to finish my table!

The table top is going to have the gloss finish so that it looks smooth and it shines. The legs and underside of the table will be done in the satin finish. I decided to use the satin finish on the lower portion because it will hide not prints. =D

First thing that I am going to do is to remove the fold-up sides and take them to the workspace outside. Then I will grab set the leaf from in the closet and take it outside too.

These three pieces are a good place to start because we can still use the table while they are removed. It is also good because I needed to replace the hinges for the fold-up sides.

The hinges creak loudly when the fold-up is in use. At first I thought that it was because the table was old and the wood was rubbing together. But when I unscrewed the hinges I would that the wood was stripped. I am going to try to find hinges that are longer and wider to replace the originals with.

When the final coat on the sides and leaf is dry I brought them inside the house. They will be stored in the closet, wrapped in a sheet for protection, until the tablewas completed.

Then I took the table outside and stained it. It took all day to stain it but it was well worth it. Once it was all dry I installed the new brackets and brought it back inside.

Stained Table

Amazing how much difference a few coats of stain can make!


Firewood or Projects? What happens to the table? September 4, 2013

When we bought our house in December it came with a bunch of stuff including a dinning room table. I already had a glass one with metal chairs so the table was not of use to us.

We moved it to the back patio and there it has stayed. I have to admit that the table came in handy a couple of times for things like brewing beer and painting the cabinet for the bar… but in general I want it gone.

It is not that it is a bad table by any means. The table is made of solid wood and has a removable leaf. Truthfully, I do not like how it takes up so much room on the patio. My first attempt to convince Ash we should get rid of it did not work because he had used it and liked having the work are on the patio.

Finally, I was able to convince him when I presented him with a better option. We could buy a couple of folding tables to keep in the garage. Then they would not be taking up space but would be available to use when we needed them. Now the task of finding it a new home.

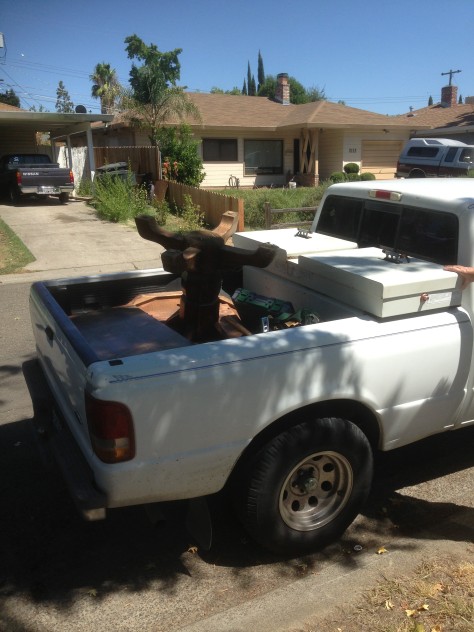
Done! Yup it was that easy! Okay, what happened was I mentioned to Marmie my plans and her face lite up. She had the prefect idea on how to transform it into the table she was looking for! Of course I am not going to share more details because it might spoil the surprise.

Table in truck

With the table loaded into the truck, I can not help but smile because I know that it is going to be a fun adventure for my Mom.