Creative DIY Like Mother Like Daughter

Creative DIY Projects

Straight from Mom……………….. Denim Rug Completed!! March 27, 2013

Filed under: Straight from Mom — designbycyn @ 8:45 am
Tags: , , , , , , , ,

As promised, a picture of the finished rug is ready.  It is not in it’s new home, but rather I took pictures of it in my entryway.  The rug is too big for the area but, you get to see it in a natural setting.

Image

I finished it off, but luckily when you make it yourself, I can still add on and make it bigger later if needed.  The satisfaction of Finally getting this rug made will last a long time!  I imagine there will be another project that frustrates me down the road, but I know that there will be a solution if I just take a deep breath (after I toss it in the closet), set it aside for a spell (I think 3 years is not a bad time frame), and then look at it with fresh eyes and solve the blasted problem! LOL  Have a super day guys……………. Cyn


Straight from Mom……..Denim Rug Continues March 21, 2013

Now at this point, you have gotten over the giggles or sympathy you felt for me when my rug fell apart.  But wait, my second lesson was to take place 3 years later (Shay is a Freshman, Col has graduated) when I opened up the closet.  The closet was chuck-a-bluck full of crafting materials, sewing materials, and what ever else I could squeeze into it.  I went looking for something in that closet, opening all the boxes, bags, etc.  At the bottom tucked away in its box was my disaster of a rug!  I pulled it out to ponder later in the day.

Deciding to give it another go, I visited the same store and gave them my sad story.  This time they recommended fishing line, it shouldn’t break due to its strength!  Wonderful, I was back in business.   Pulled it all out, got the old thread all removed, and started again.  This time I was confident, my perch on that pedestal was slippery but I would remain seated!  A month later, after working on the rug during my free time, it was 2 feet round.  When I lifted it to set it aside every evening, it didn’t SNAP, whaaa hooo!  Unfortunately, it stretched, the fishing line just grew and grew.

Wham, into the closet it went!

Now, I was pissed!  I was convinced those women had no idea what they were talking about.  When I got over kicking the box everytime I came across it, I would figure out how to make it work MYSELF!

Well, life has a way of passing very quickly.  We are grandparents now, Colleen is married, Shay has been out of high school for 6 years, my busy, frantic, hectic life of being Mom has slowed down.  The closet is still there, still filled to bursting, and I once again I find that dreaded box.  I was pleased to find that my children still had me on that pedestal, I hadn’t crashed and burned that fateful day.  Shay looked at the box and calmly said, “You are going to make that rug for me, yes?!  You will get it this time.”  With that kind of confidence in me, I decided to tackle it again.  Third time is the charm right?  I grabbed all the components and set them in the diningroom.

As fate would have it, Steven came in that evening with a spool of thread he found cleaning in the garage.  Not just any thread, but waxed string, the kind we used for leather crafting back when we were in 4-H as kids.  He knew I had dragged that rug out and was courageously going to make another attempt.  Being my partner in all my sundry crafting adventures, he thought it would be the perfect solution to the problem.  The wonderful man was correct as usual!  Just look at the rug now, it is 3 feet round and growing……………

Image

I am still working on it.  It is larger than my kitchen table now, with all the extensions in it!  Shay was hoping for an 8′ round rug, but it is 6′ plus and getting way too heavy for me to move around now.  So, I am going to finish up the balls of denim I have going and call it a day!  Shay is supremely pleased with it, he even remarked it is “beautiful”.  The highest compliment to date, usually I get “that’s nice Mom.”  The feeling of accomplishment I am feeling is euphoric!  Perseverance paid off and though I am not ready to start a new one, there is one forming in my mind for later.

I will post again once the rug is finished and in place………………………… Cyn


Creating a Bar Area February 13, 2013

Ashlin has talked about having a bar area even before we owned a home. So when we were setting up the living room/dining room area we added a place for it.

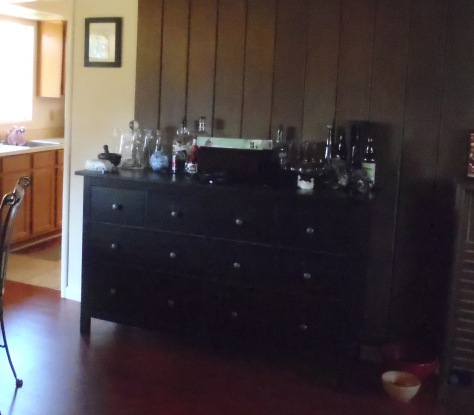
Our bedroom did not have enough room for our dressers because one whole wall was closet. We used his dresser in the dinning room as a bar top area. It looks good and now we have space below for bottles and misc glasses that we did not want to be sitting out.

Bar AreaBut it did not seem complete. Ash talked about needing a place for aging beer bottles where they could stand and not be in daylight. We talked about adding a cabinet and some shelves above the bar. He did some shopping online and could not find what he liked. I asked him if any of the shelves looked like a fit because we can always make doors for the cabinet. This gave him renewed though and back to searching he went. He found shelves that match the bar cabinet (previously his dress) at IKEA. Before we actually went to IKEA I had an idea which would be more thrifty.

The white hutch in the spare/craft room had broken drawers so it was ackward to use but the shelves at the top are in good condition…

White Hutch

I know it does nt look like it because the paint is pretty bad =) Why not use the shelves as the launching point for the bar cabinet!

Ash was happy with this idea so I went to work emptying the cabinet and moving it out to the garage. Now it is time to get all the supplies and give the shelves a new life.

I can not wait to get started and share this project with you!

For more of where I get my creativity from visit my Mom’s site Design by Cyn


Old Couch Cushions Used for New Purpose January 23, 2013

On December 5, 2012 I talked asked about what to do with old couch cushions? . I did some research online and found loads of ideas but I found one that works best for our household.

My dog Dixie had an injury to her back leg and hip a few years ago and feels better when she sleeps on a softer surface. I fully admit that I spoil her but it is honestly wonderful to not hear her whimper in pain the morning by giving her a soft place to sleep. With that in mind I decided to build her a dog bed for her continued comfort.

Dixie likes to sleep stretched out and since she is pretty good size dog I decided that I need to make the bed length two cushions long. First I tried laying one large cushion and one of the smaller ones together but it made the bed slant and she always ended up sliding off one end of the other. So I took the two large cushions and removed the original covers that were on them.

We had some old twin size grey sheets that were not being used so I laid out the  sheet and placed the cushions on top so that I could get some accurate measurements.Dog Bed Cover Start

The sheet just fit with no real need for cutting. This is a happy thing for me because things have been a bit rough at our home since we moved in. so Hooray for things going my way!!! =)

I considered using spray adhesive to glue the sheet as the new cover of the cushions but decided against it. My dog loves to roll in the dirt. My parents had her for the past three years due to housing rules in California… ggggrrrr I really do not like that there is such discrimination against certain breeds of dogs… Sorry venting a little there. During the time that my parents had her they lovingly nicknamed her “Miss Piggy” or “Pigpen” LOL! So gluing the cover to the cushions would eliminate any chance I would have of washing it when she makes a mess of it.

Instead I used sewing pins to mark out where I needed to sew the end and sides to seal the cover. Once it as all pinned it was time to sew and turn it right side out. Then with the help of Ash, we put in the cushions and the cover was complete.
We set it on the ground with the open end folded under.

Dog Bed Cover Complete

Now that the bottom is done I am going to use the smaller cushions to make an edge to go between her and the way. I mentioned that she likes to get dirty well she also like to rub against the wall as she slides onto her bed. My parents have to repaint some of their walls to remove the dirt stains. You can certainly tell where her favorite places to sleep were. Sorry Marmie!!

I think that I might need to look into using the smaller cushions for a back piece so she does not rub the wall getting comfy on her bed. I am pleased with it so far and can not wait to continue making improvements!

For more of where I get my creativity from visit my Mom’s site Design by Cyn